
How to Add a Custom Domain in Your Zezo OTT Project
Adding a custom domain to your Zezo OTT project is a simple process if you follow the correct steps in the Zezo Cloud Console. This guide walks you through the exact workflow to connect your domain successfully.
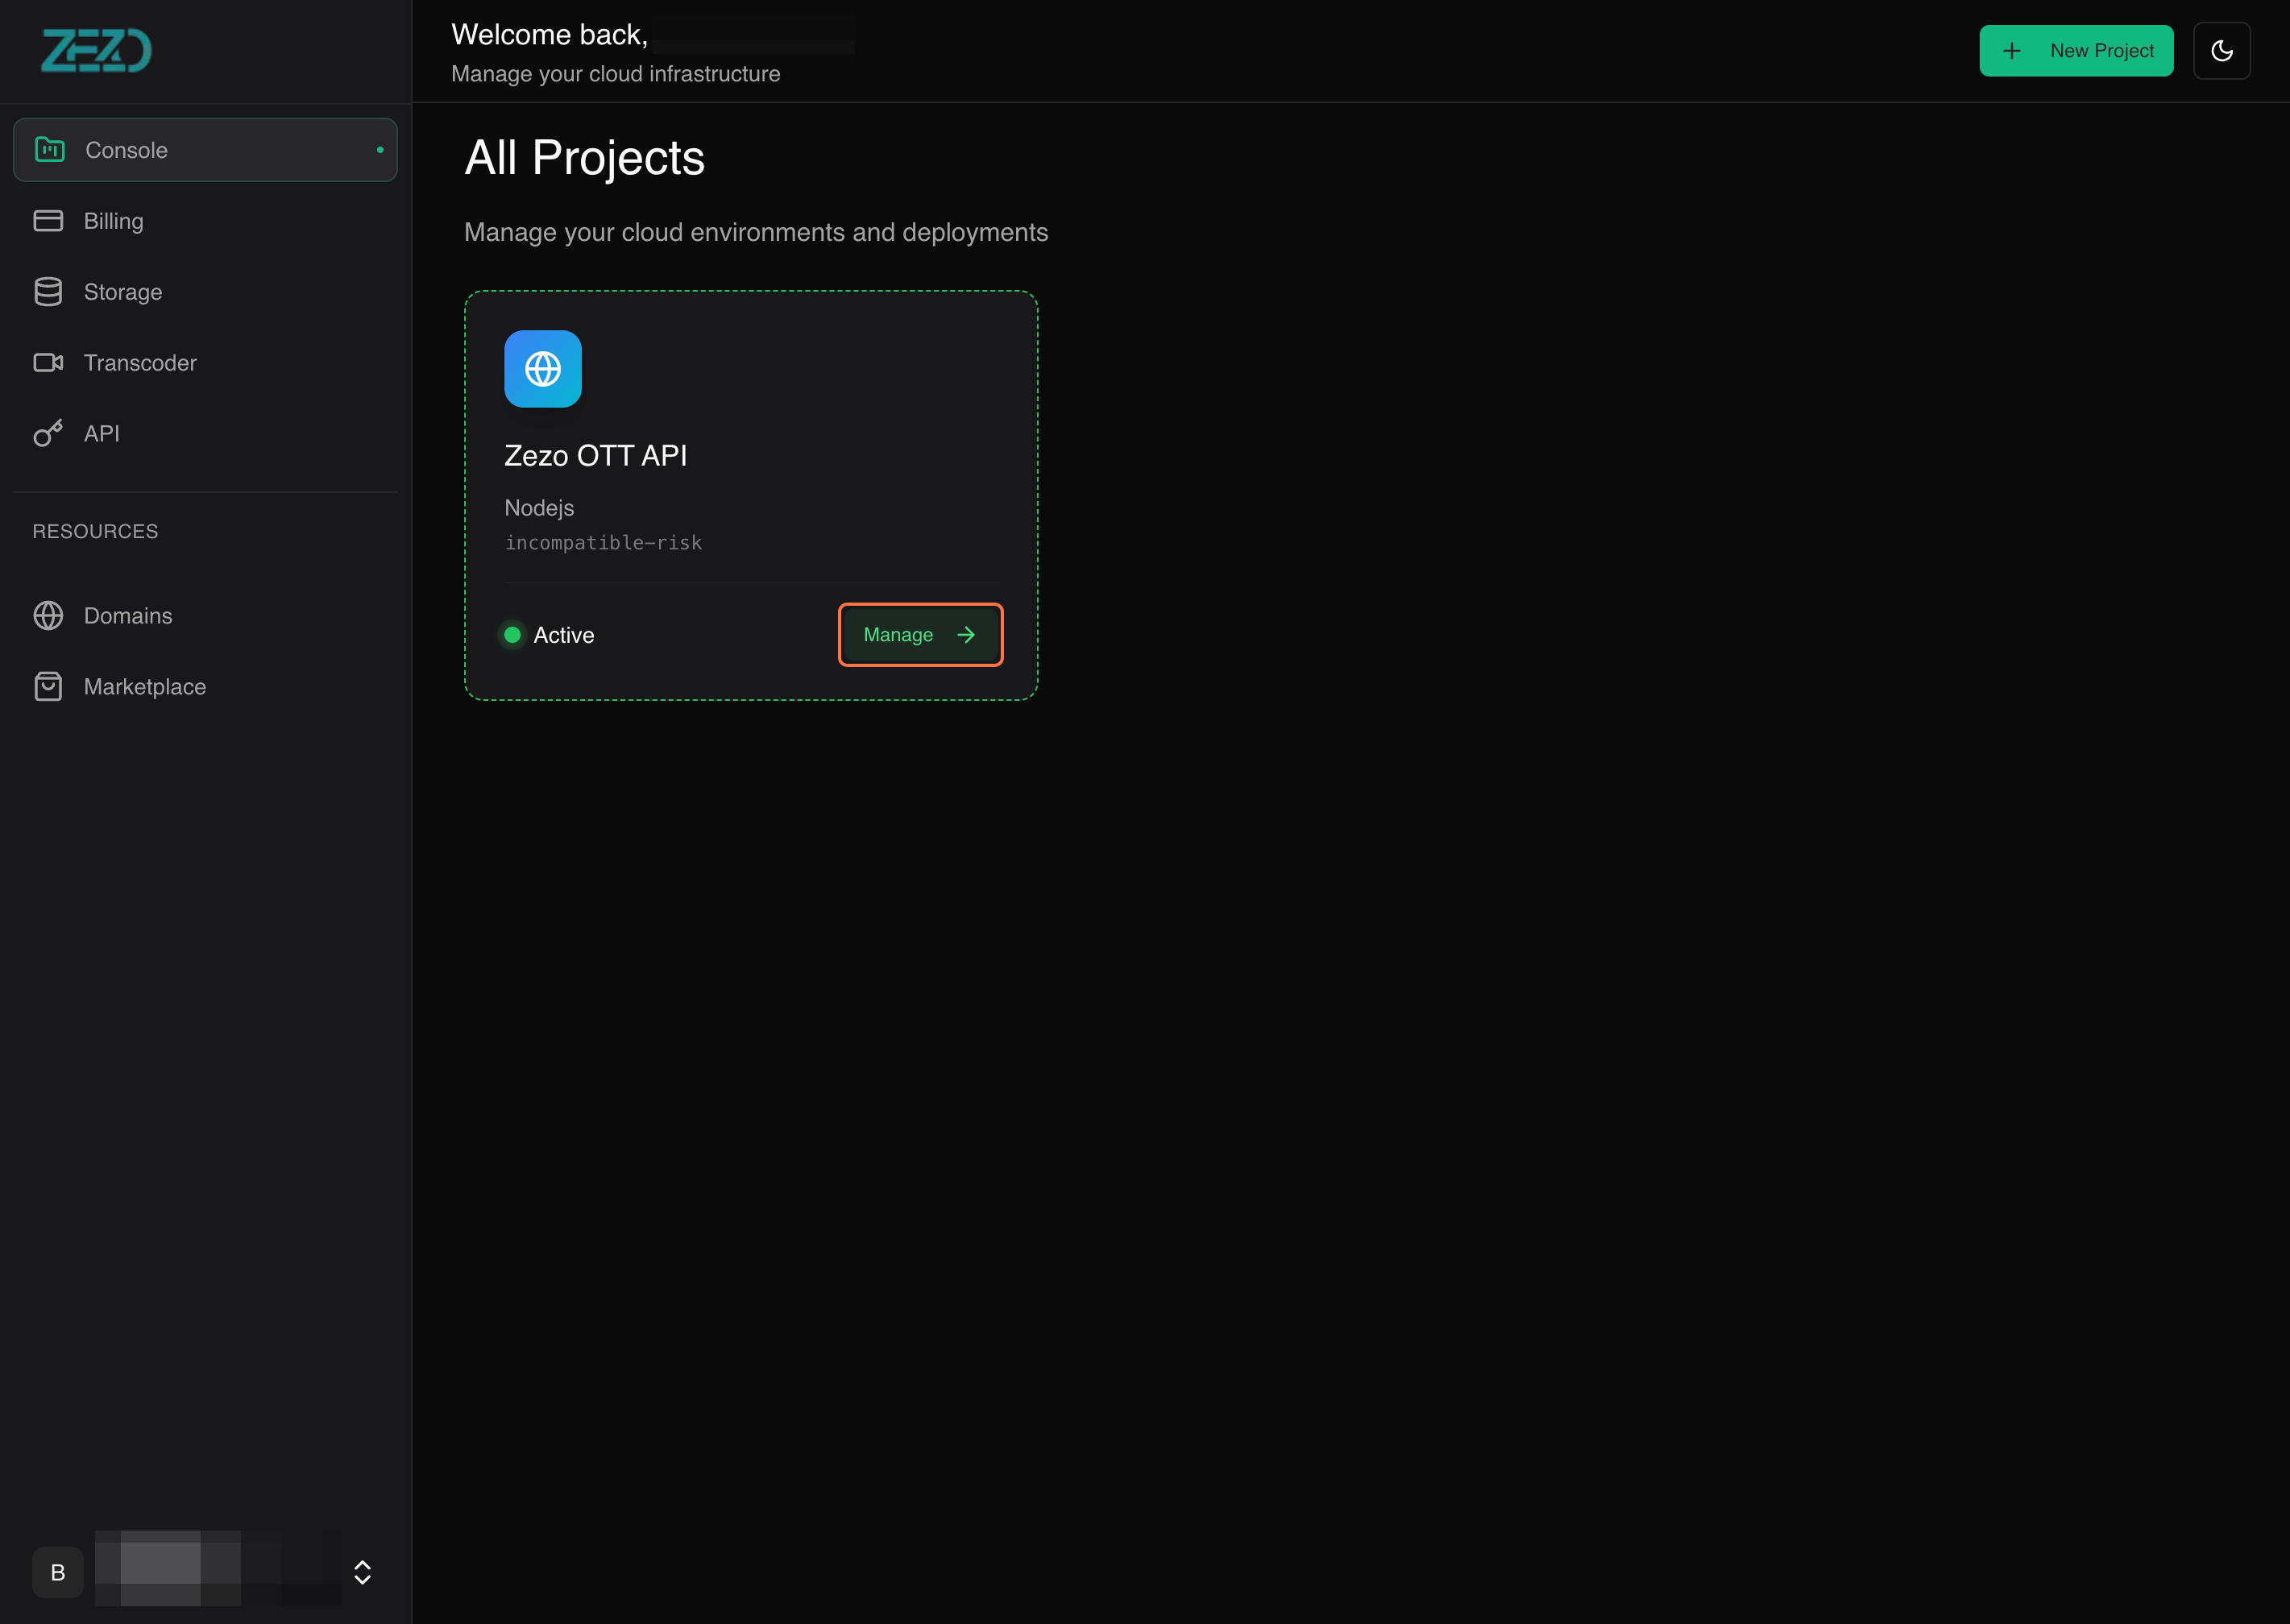
Step 1: Login to Zezo Cloud Console
First, log in to the cloud.zezo.in console.
- Select your project
- Click on the Manage button
You will be redirected to your project dashboard.
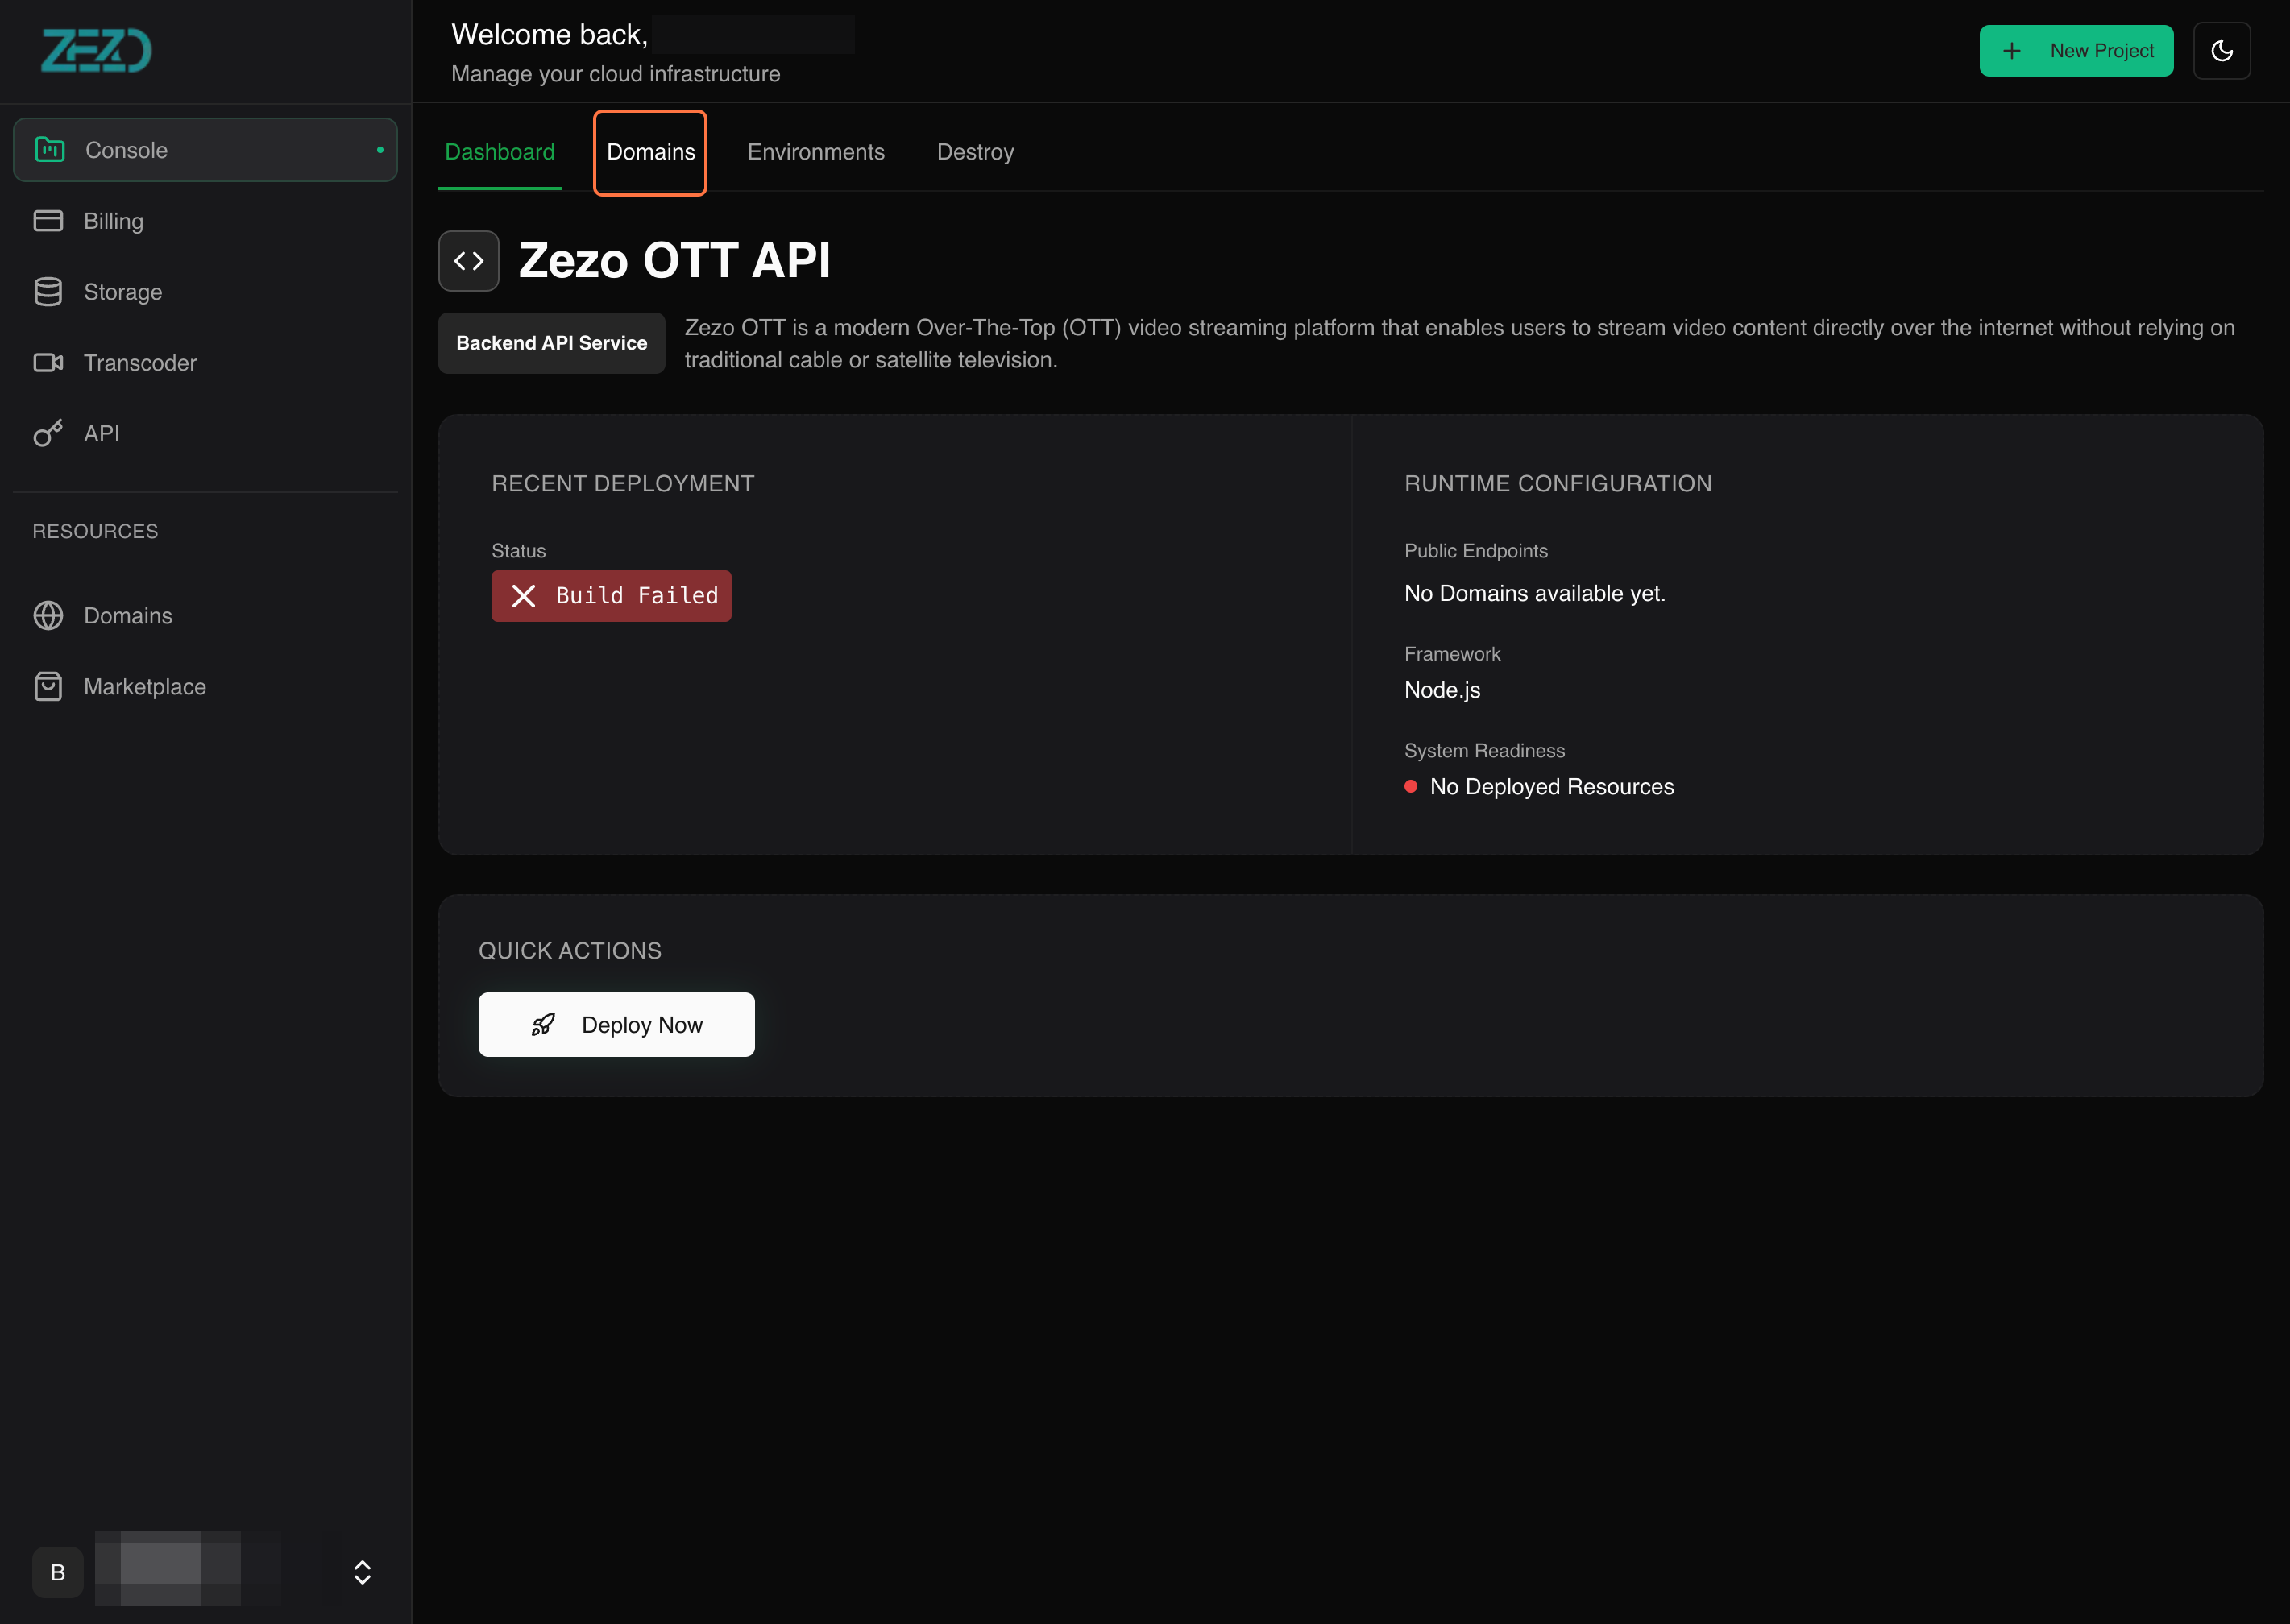
Step 2: Open the Domains Section
Inside your project:
- Click on the Domains tab
- You will see the list of existing domains (if any)
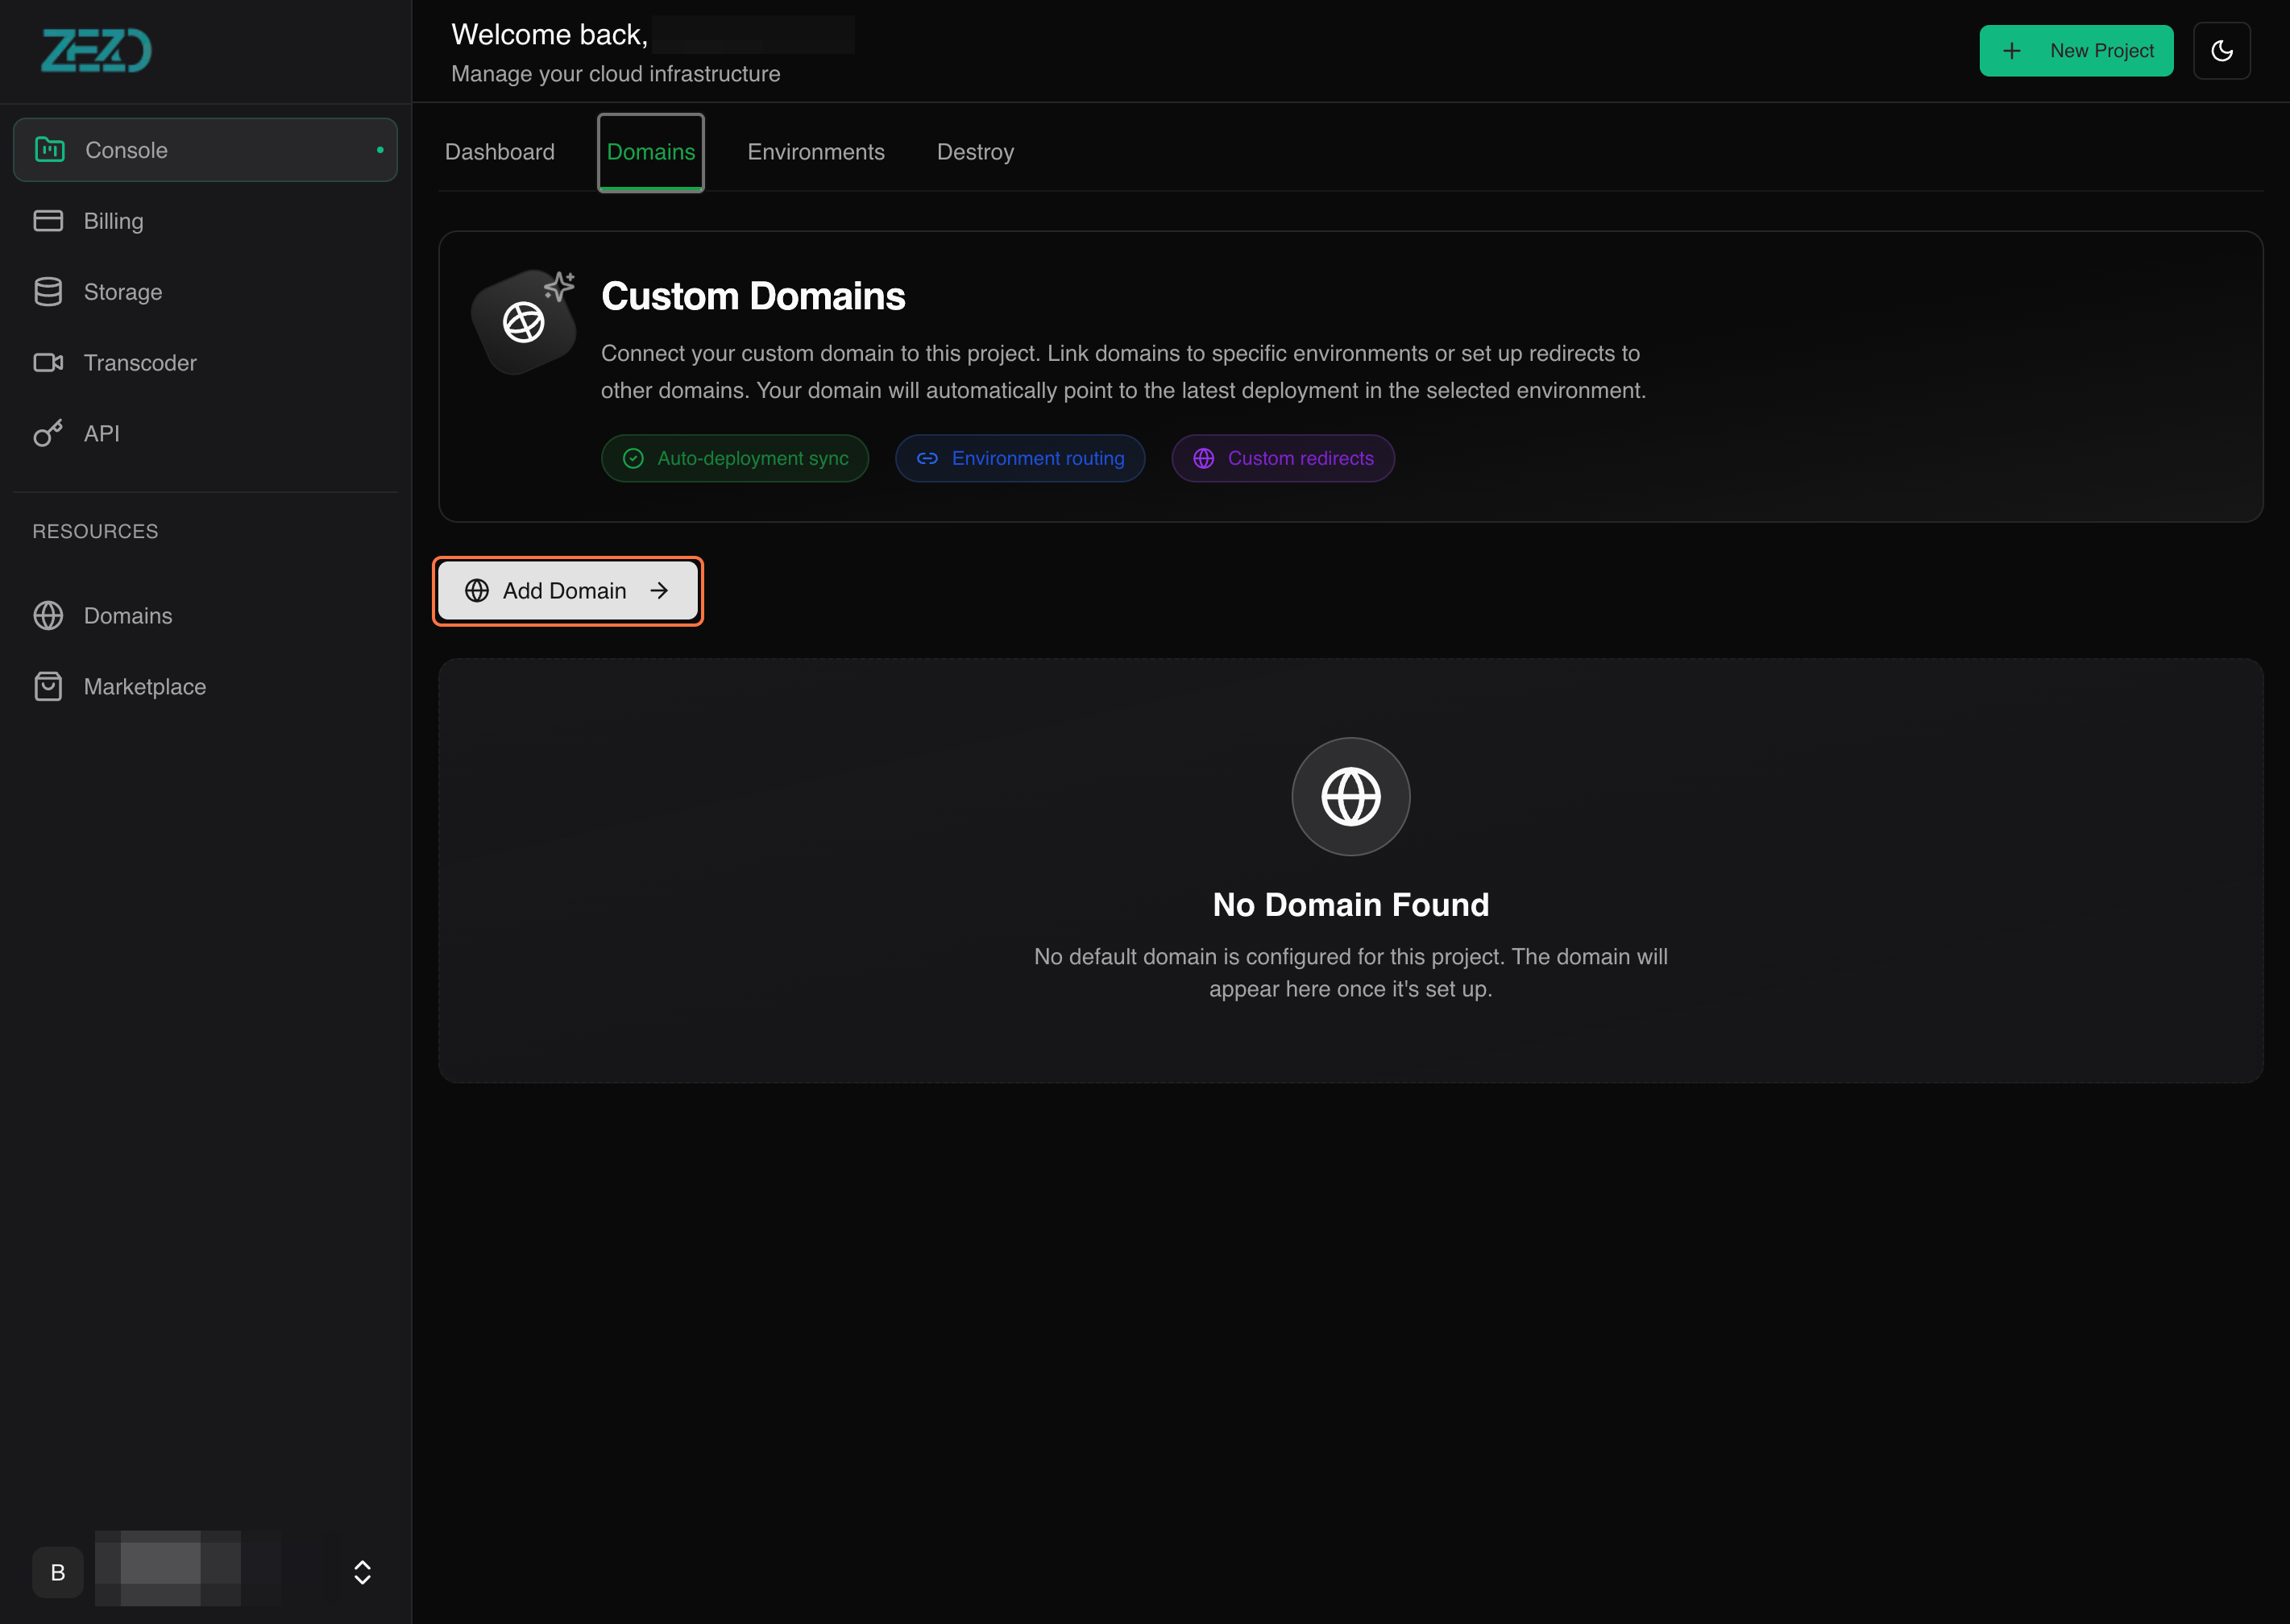
In the domain section, click on the Add Domain button.
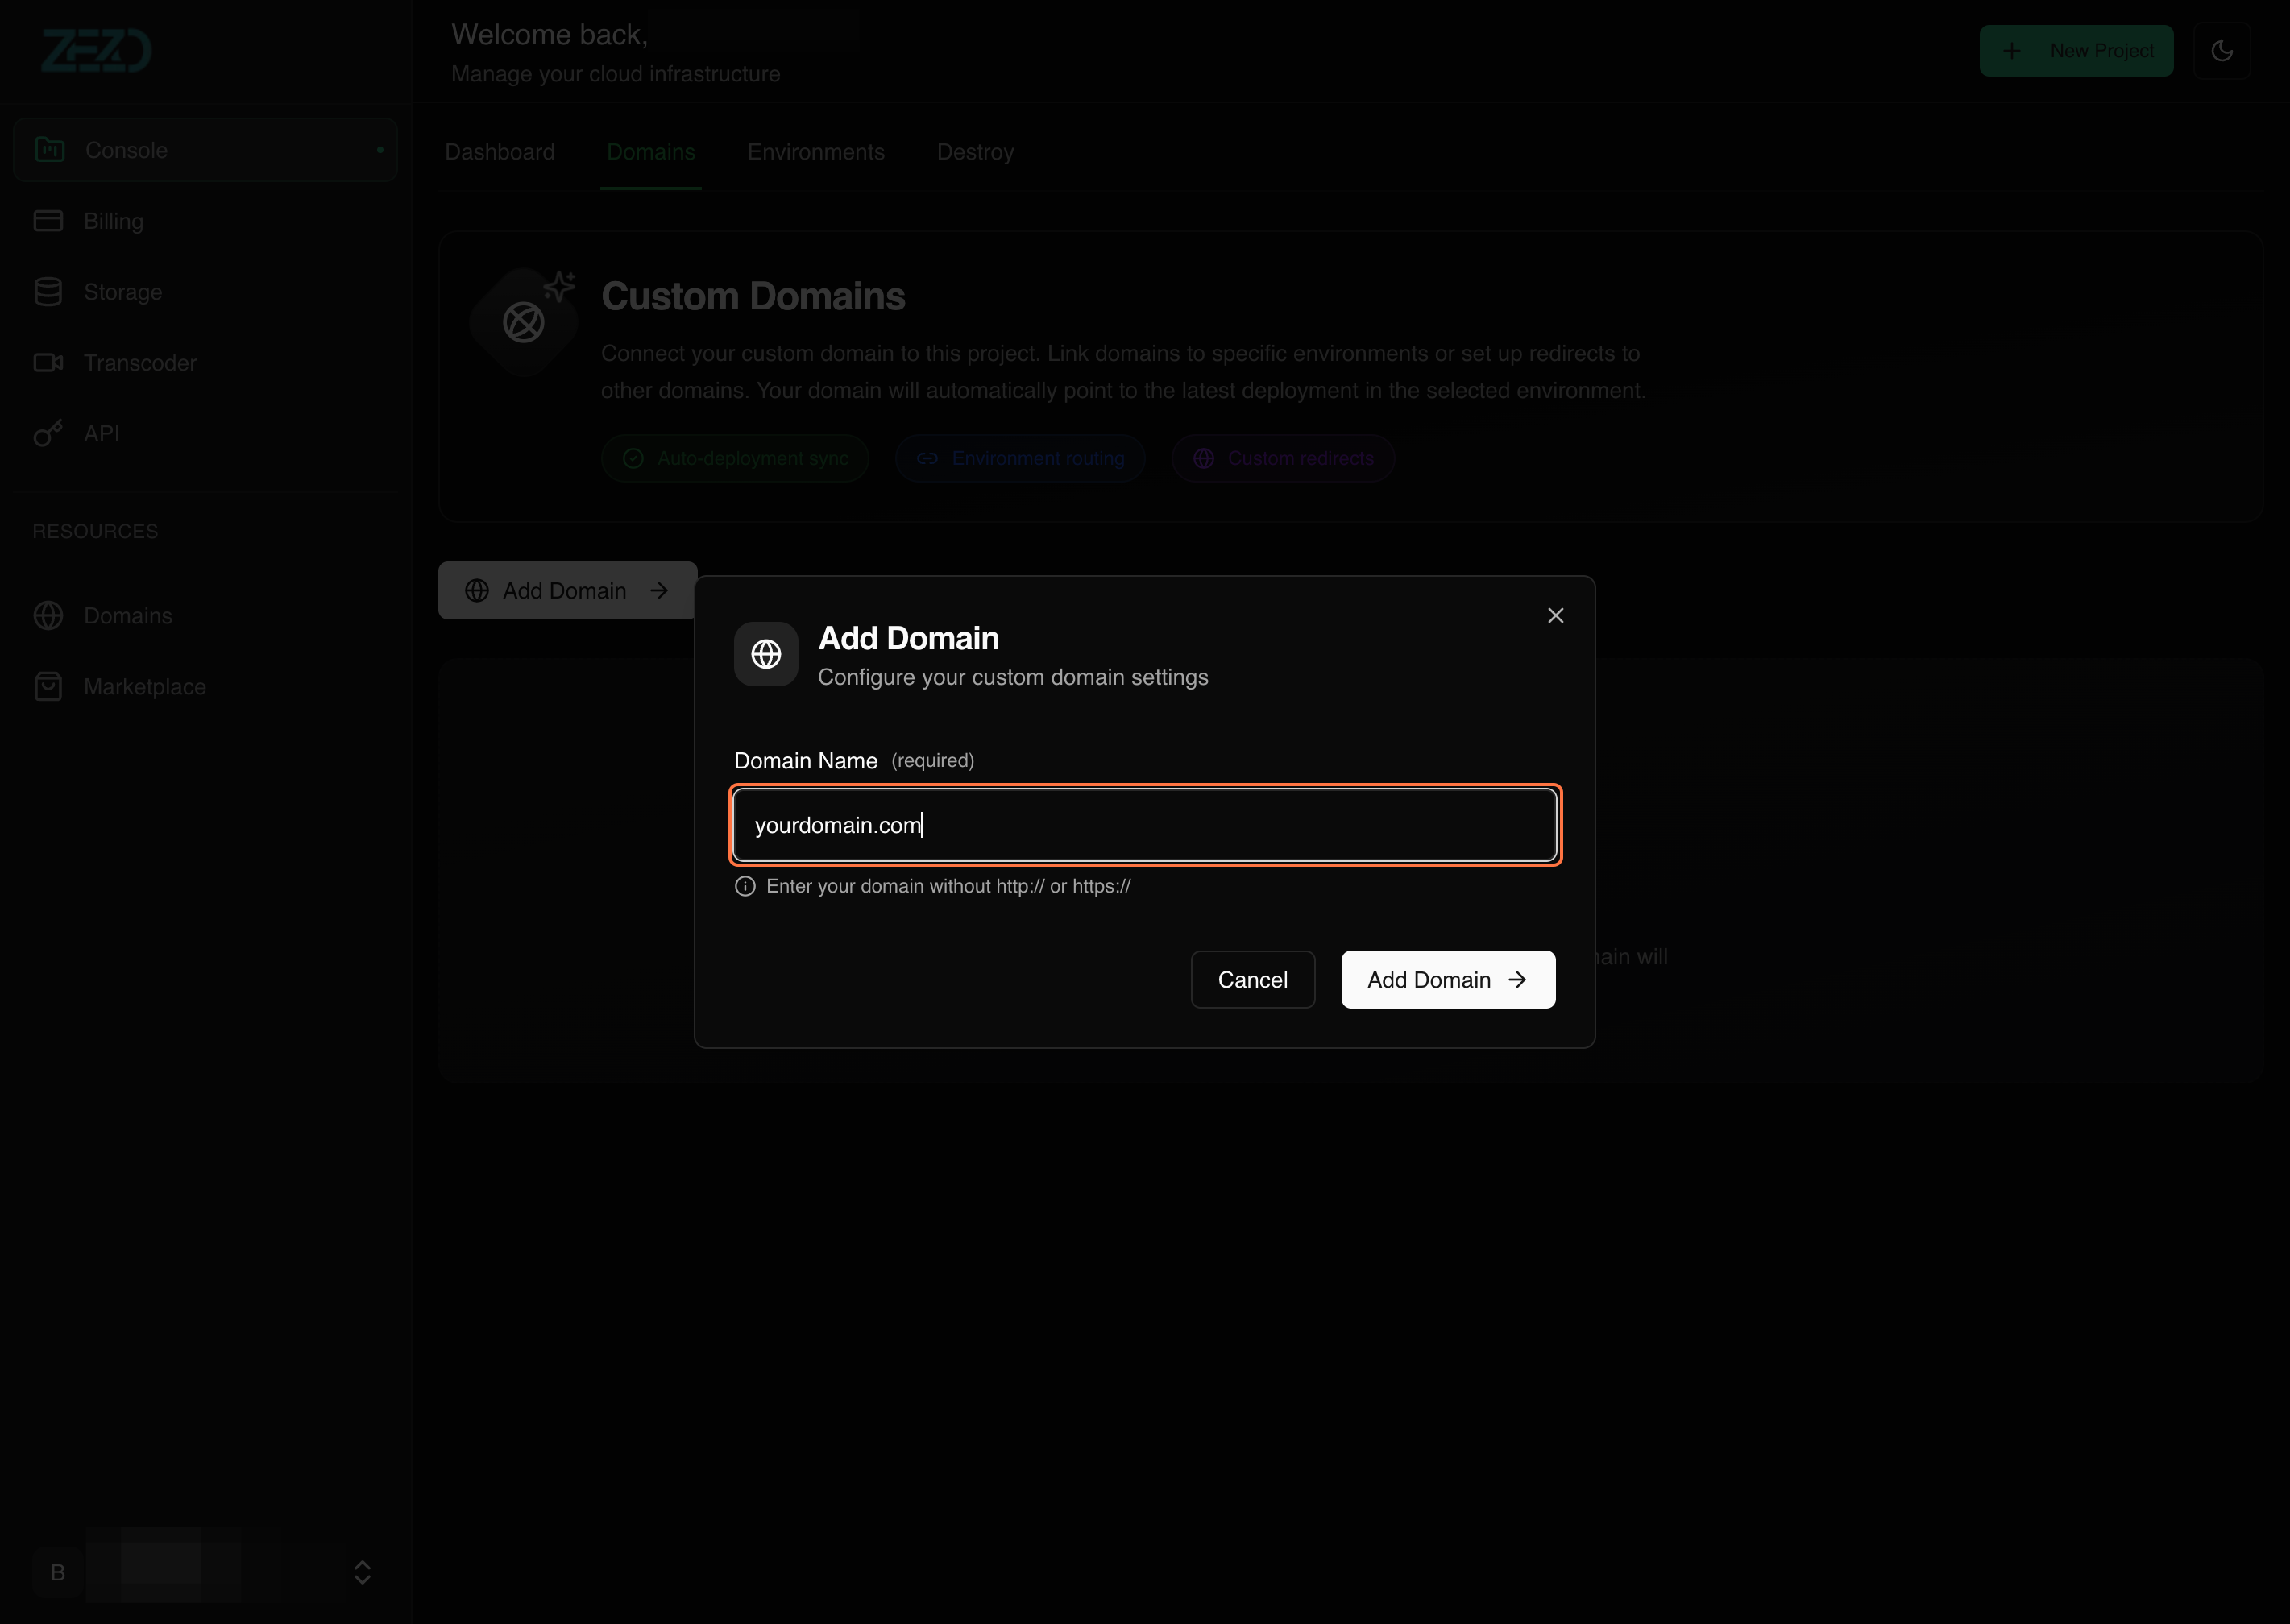
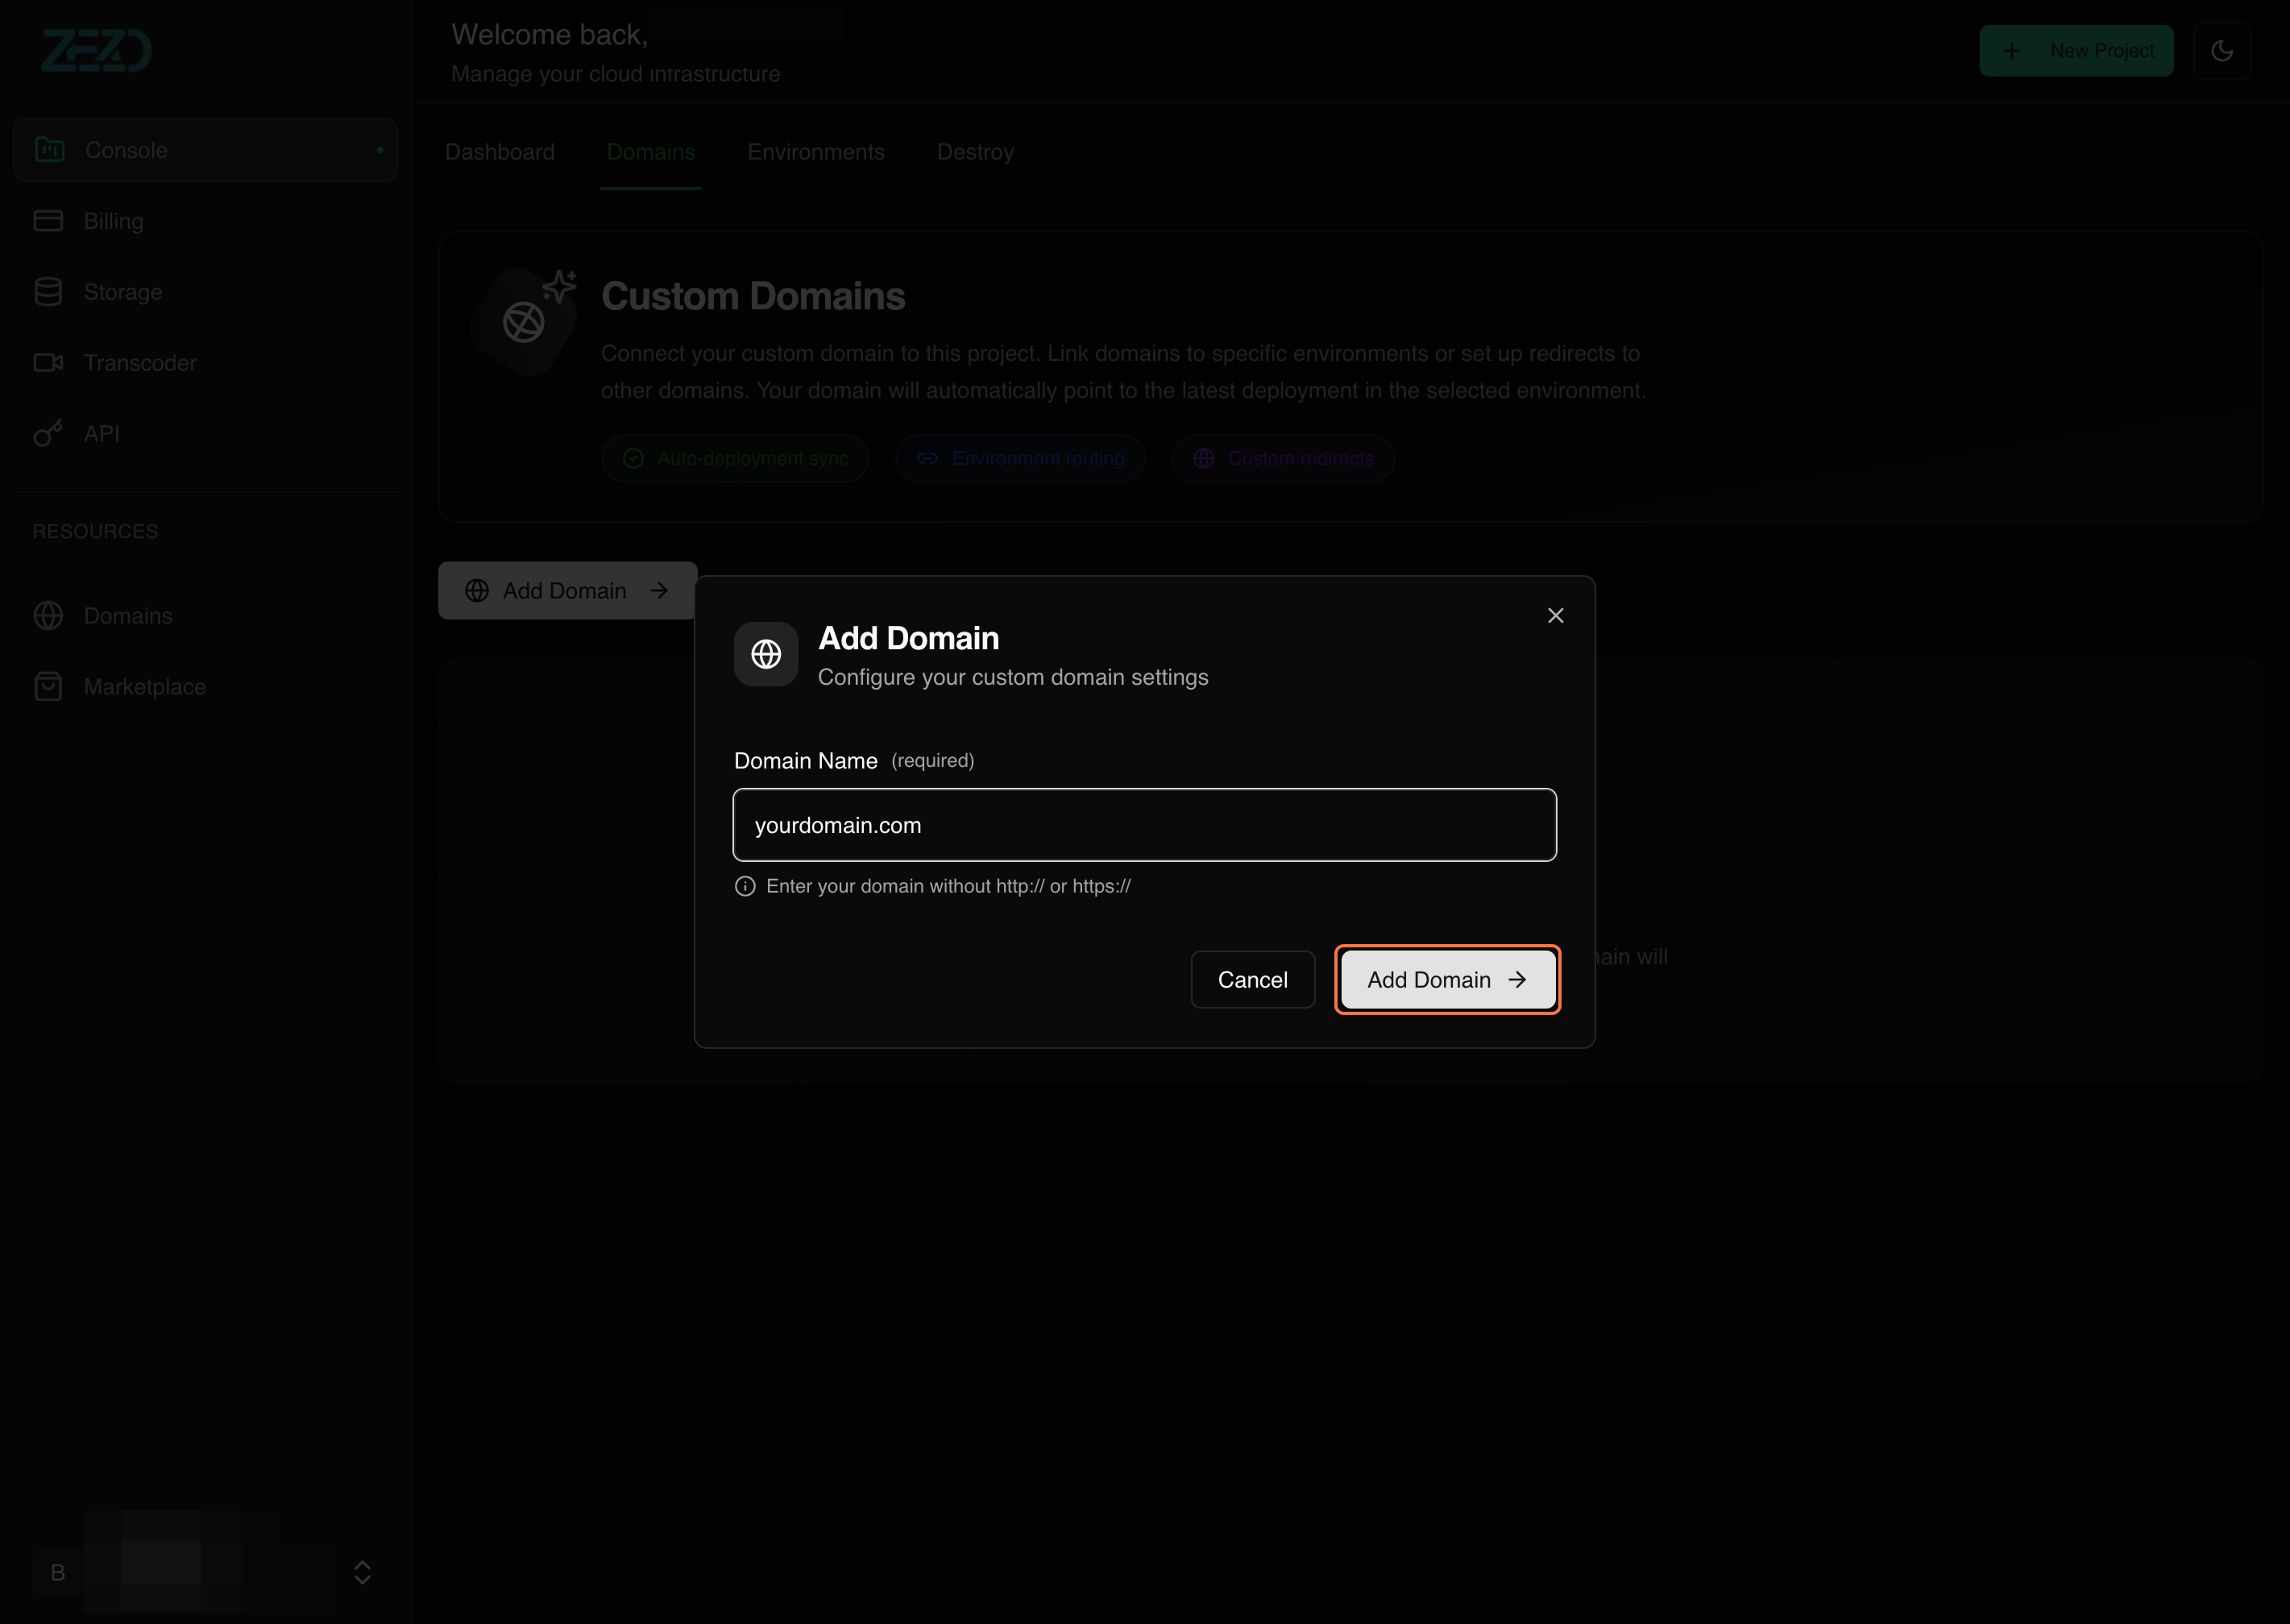
Step 3: Add Your Domain
After clicking Add Domain, a modal will open.
- Enter your domain without
https://orhttp://- Example:
example.com
- Example:
- Click on the Add Domain button
Once completed, your domain will be added successfully.
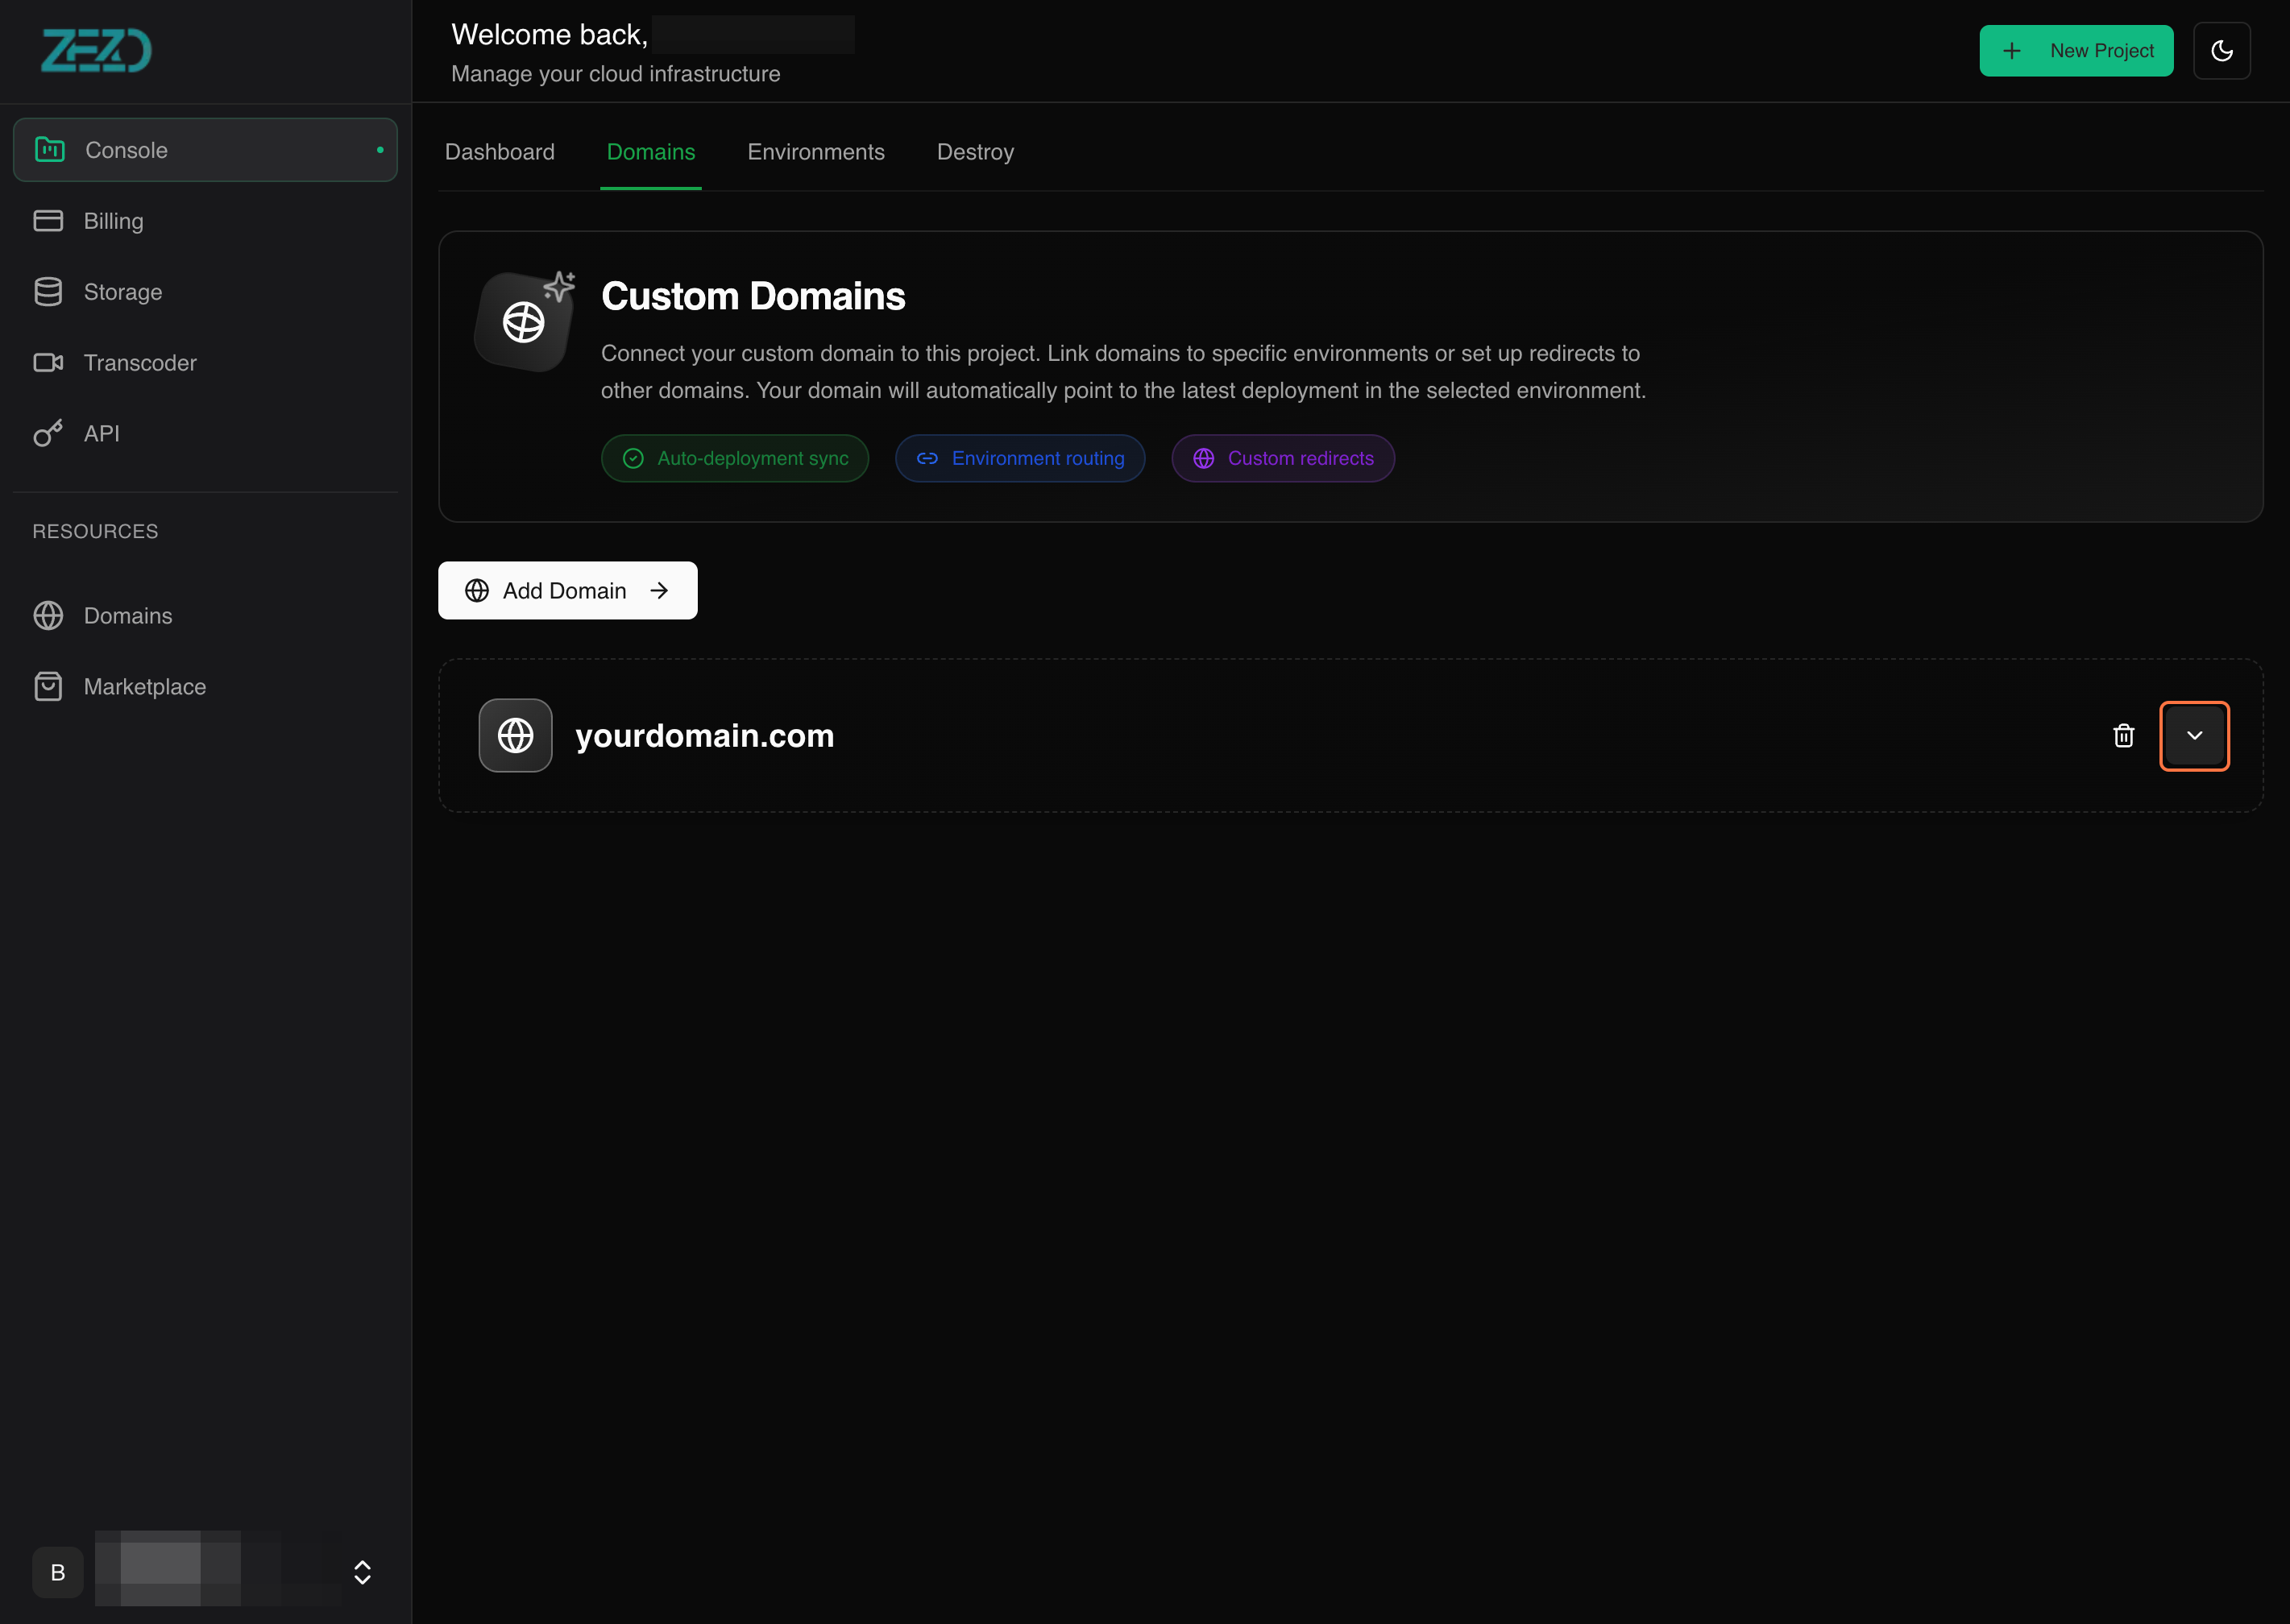
Step 4: View DNS Configuration
After the domain is added:
- Your domain will appear in the domains list
- Click on the down arrow icon on the right side of the domain
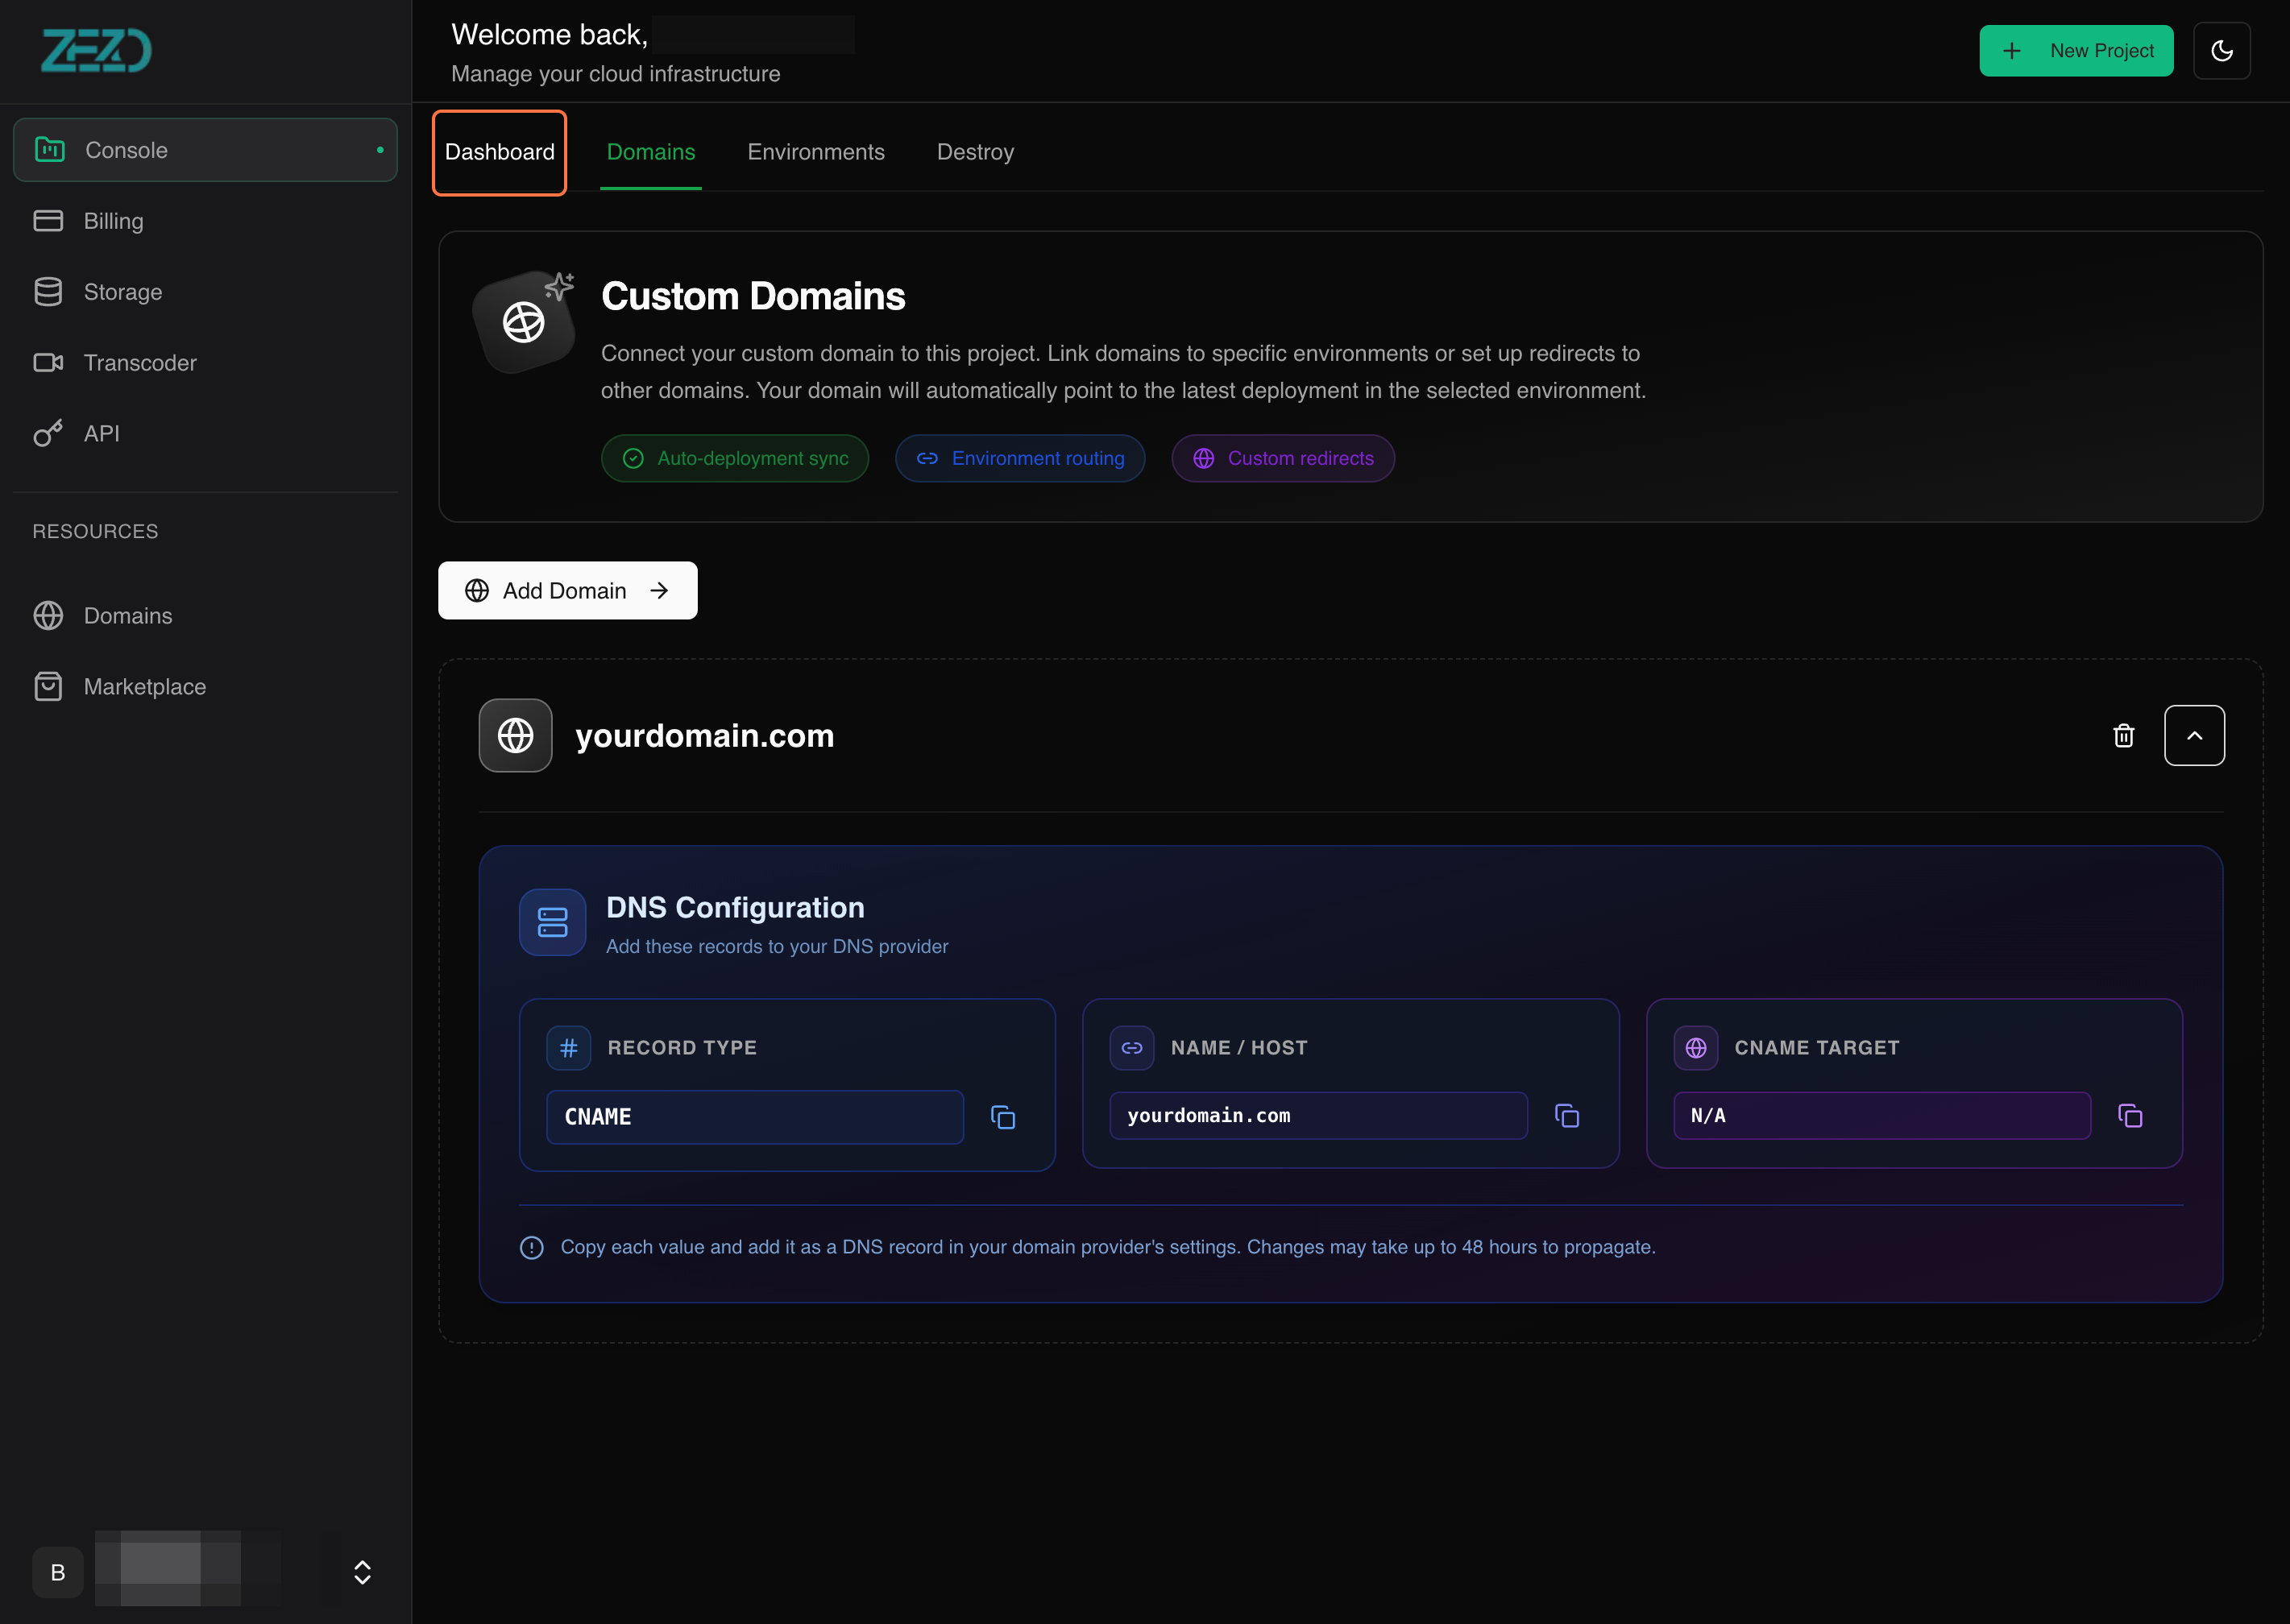
You will now see the DNS configuration details.
DNS Record Details
Record Type: CNAME
Record Name: your domain
Record Value: value
Step 5: Update DNS in Your Domain Provider
Now, go to your domain provider or DNS manager (wherever your DNS is managed).
- Add the provided CNAME record exactly as shown
- Save the DNS changes
DNS updates may take some time, so make sure the record is added correctly.
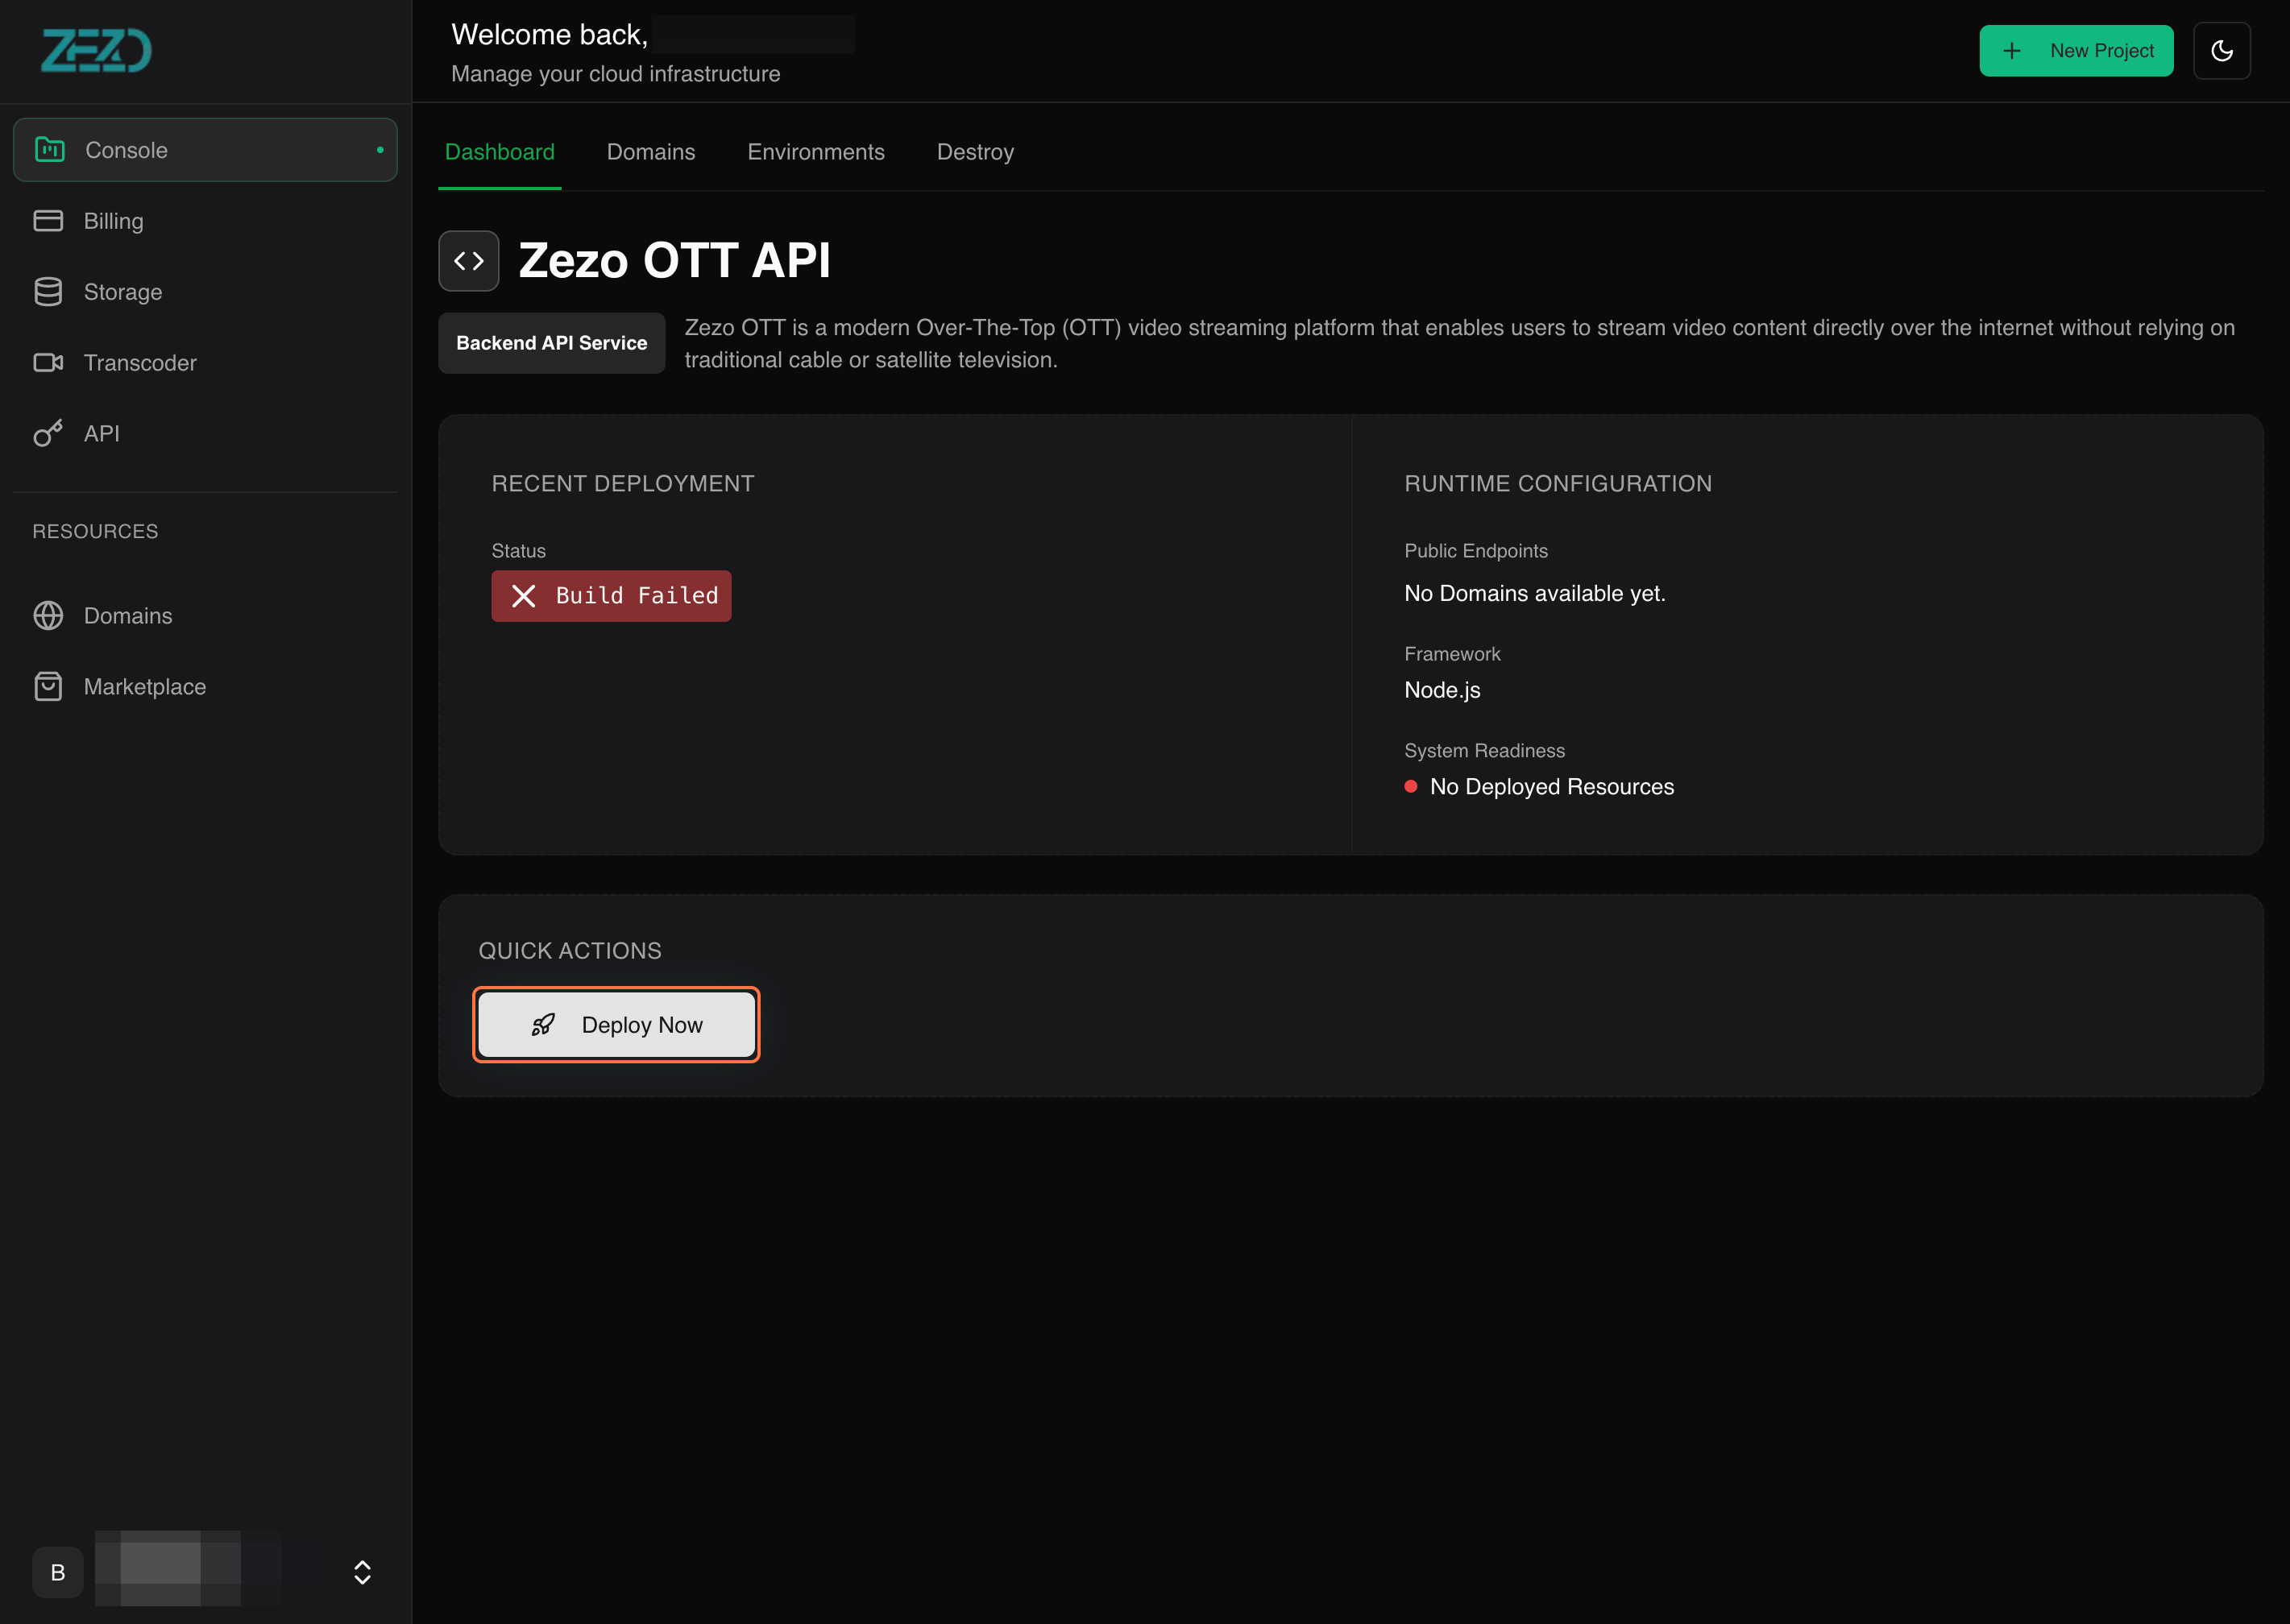
Step 6: Deploy Your Project
After adding the DNS record:
- Go back to the Dashboard in the Zezo Cloud Console
- In Quick Actions, click on Deploy Now
A new deployment will be created.
- Deployment status updates every 30 seconds
- Wait until the status becomes Active
Final Step: Domain Connected Successfully 🎉
Once the deployment status is active, your domain is successfully connected.
⚠️ Note: DNS propagation can take some time. If the domain doesn’t work immediately, recheck your DNS configuration and allow some time for the update to complete.